To run AwesomeAds demand on your website, you need to set up placements for each format in the AwesomeAds dashboard.
To set up the placements, you first create the website in your AwesomeAds account, then create the ad placement(s) for that site, and then generate the tags for each placement.
Create the website
- Select the Apps and Sites tab, and then click Create a new app/site. The New App/Site view is displayed:

- Enter the website details:
| Item | Description |
| Name | Enter a unique and descriptive name for your website, so it can be easily identified in reports. |
| Property type | Select ‘Website’ as the property type, and enter the domain name. |
| Audience info | Select the age and demographic that suit your platform best to ensure the most relevant ads appear for your users. – To increase relevance, it is recommended that you select a maximum of two age groups per site. – ‘Teens 13-16’ cannot be selected in conjunction with any other age group. Because our advertising is contextually targeted, we require high levels of accuracy when selecting your age buckets. If you are unsure of your age demographic, try getting a young person’s opinion. If you cannot decide, reach out to your Account Manager. |
| Auto approval | This setting determines whether all ads are approved by default or if you’d like to approve every ad that runs. – If set to ‘On’, you automatically accept all contextually relevant ads from our adserver. Auto-approval is recommended, for scalability. – If set to ‘Off’, you will need to dedicate resources to manually approve each creative before they go live. This will impact your fill rates and is not the optimal setup. |
Create the placement
Next, create your placement. To do this:
- Enter a name for your placement. Choose a unique and descriptive name, so you can easily identify the placement in the dashboard and reports.
- Click Save. The New Placement view closes.
- In the Apps and sites view, expand the site to view the details of the new placement:

| Item | Description |
| Dimensions | This indicates the position and size (in pixels) of the ad on the website. |
| Placement name | The name you provided for the placement. |
| Placement ID | A unique placement ID. This is used to call the tag using the SDK or to report on placement level performance. Placement performance reporting is great for campaign optimisation and troubleshooting. |
| Linked ads | The number of live ads that have been linked to the placement. This is zero until your placement goes live. When you first create your tag, there will be no ads linked. As soon as you begin to send requests, this number should reflect the number of suitable ads for this placement. |
| Get placement tags | Click to generate the placement tags for the placement. NOTE: This option is visible only when you hover over the placement. |
| <Settings> | Click to: – Provide the URL and an image for the creative you wish to use as a fallback. – Provide a fallback tag. – View the impression / click counter. – Preview a mock-up of the ad as it will appear on a mobile device. – Edit the details of the placement. – Delete the placement. |
Get the placement tags
- In the Apps and Sites view, expand the website to view the new placement.
- Hover over the placement and then click Get placement tags:
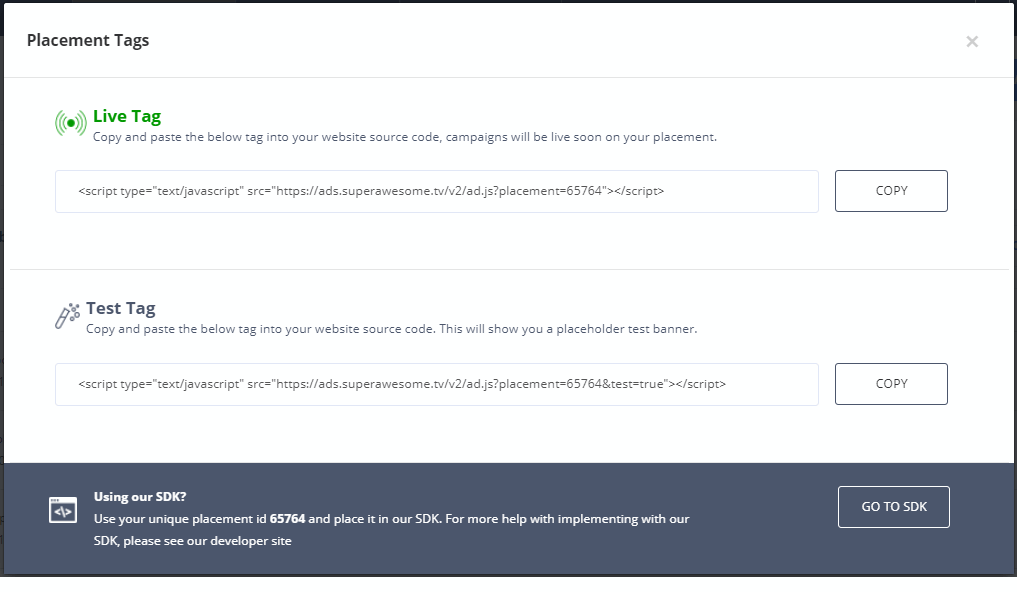
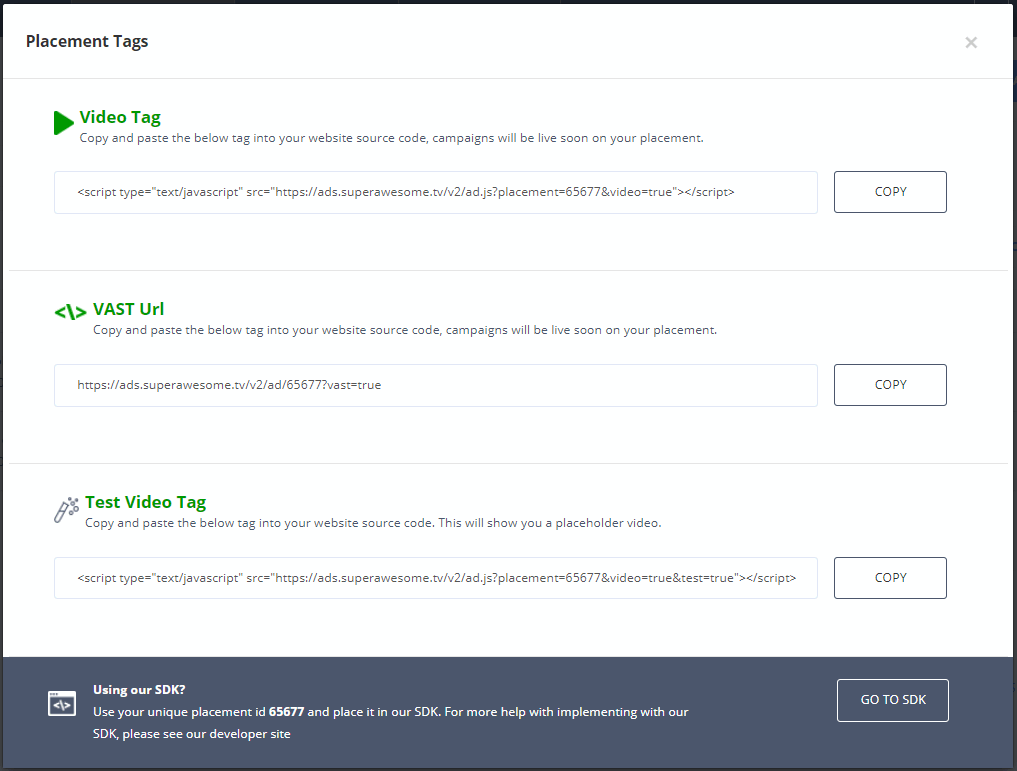
 The Placement Tags view displays the auto-generated tags.
 - If you are using a mobile or desktop format, copy the Live Tag and paste it into your source code:
 For video placements, copy the Video Tag or VAST URL, as required. Alternatively, for integration via the SDK, use the unique placement id displayed at the bottom of the view:
Each tag contains the unique placement ID.


